I got this really great ribbon from American Crafts. It has a scalloped edge to it, and I thought, "That would make a cute flower." So I created my own ribbon flower that I used in the layout below
Here's what you will need:
1. Embroidery Floss (around 6 inches or so depending on the size of your ribbon)
2. Ribbon/Lace (around 6 inches)
3. Needle with a smaller eye
Here's what you do:
1. Begin by threading the needle and knotting the end then weave it through the edge of the ribbon.
2. Cinch the ribbon tightly by pulling the ribbon toward the knotted end of the embroidery floss.
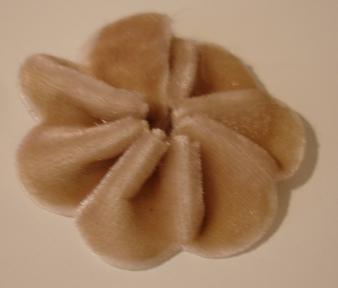
3. Keep weaving until you have created the desired fullness and look
4. End with your needle coming out the top of the ribbon then poke through top of where you started so your needle ends underneath the flower.
5. Trim the excess ribbon and tie your floss in a knot getting the knot closest to your beginning knot. I try to make both knots to look like one like in the photo below.
6. Cut of the extra floss
You can embellish these with brads and layer with other flowers.
In my layout I layered with tulle and used a brad


3 comments:
Renee, love the flowers and the tutorial!
that is AWESOME!!!!
very nice.....thanks for sharing...
Post a Comment