Good Morning everyone! I hope you are all enjoying your weekend! Today, I’m going to share a few tips for using paint on your mini albums. Of course, you could use these tips on your everyday scrapbook pages as well, just remember to use thick cardstock. It seems that a lot of people are a little afraid of using paint, but I’m hoping to get you all out of that! No matter the outcome, just tell yourself, “It’s just art!”
What you’ll need:
Chipboard mini album
Acrylic paint (3 different colors at least)
Texture Builder for acrylic paints (you can find this in the paint section as well)
Small mist bottles (such as Ranger’s Mini Misters)
Lace paper scrap
Paint brush
Round sponge brush (not pictured)
Paint tray
Optional: Puffy paint (not pictured)
Technique 1: Using lace paper and paint to create interest.
Step 1: Paint the album page a one solid color and let it dry.
Step 2: Put the lace paper over the dried page. You can secure it with masking tape or some other way, but I’m messy and just held it.
Step 3: Let it dry and then decorate.
Technique 2: Using mini spray bottles with paint.
Step 1: Paint the album page a solid color and let it dry.
Step 2: While it’s drying, take two spray bottles and put one part acrylic paint (one color in each) and one part water in each bottle. Shake and test spray.
Step 3: Once the page is dry, spray the first color on.
Step 4: Spray the second color over the top and let dry. Then decorate!
This is one of my favorite techniques! I love the way the colors bleed into the original brush strokes! It looks really awesome in person!
Technique 3: Using Texture Builder
Step 1: Mix acrylic paint and texture builder to create desired texture (or as directed on bottle). I used one part paint and 3 parts texture builder.
Step 2: Using round sponge brush, lightly dab the paint mixture onto your page, and slightly twist it as you pull back up. Play around with it a find a method that pleases you.
Step 3: THE HARD PART!! You HAVE to let it completely dry. I recommend NOT using a heat gun because it may mess up your effect. Let it dry the old fashioned way.
Step 4: DECORATE!
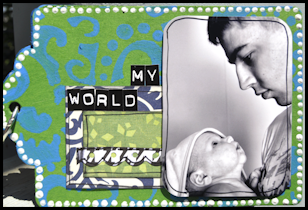
And now you may ask, “Well what about the optional puffy paint?” Notice all of the white dots around my finished pages? That’s the puffy paint! I love using puffy paint as an extra little added design element. It’s also great for doodling (butterfly trails anyone??)!
If you would like to see the rest of the pages in my album, visit my blog alongcamedani.blogspot.com.
Hope you all have a great Sunday!!
-Dani


3 comments:
okay girlie.... its been a few years since ive played with pain on my layouts and you have made me seriously want to drag it out again and get messy!!
awesome techniques
Fantabulous tutorial, dani!! No surprise.
Wow, what a fabulous tutorial! I am going to look for that texture builder!
Post a Comment