
Today I am going to share with you a simple yet effective paper tearing technique that will create dimension on your page. You will need 2 sheets of patterned paper, a pencil and a paper trimmer.
Step 1. With your two co-ordinating patterned papers, choose which paper will be the top design (known as paper 1.) I have found if you use a bold design, complimenting it with a solid design is a wonderful look. Trim paper 1 down to your preferred size, height wise. Do not trim the paper length-wise yet. I have measured paper 1 using my photos so it will frame the photos.

Step 2. After you have paper 1 trimmed to your preferred size, trim paper 2 to frame it height-wise, allow about 1 to 1.5cm on top and bottom. Place paper 1 on top of paper 2 with the edges (short side) touching.

Step 3. Hold the two sheets of paper in your hand and slowly rip the edge towards yourself. Make it as grayed and jagged as you wish.


When you have finished ripping and you move paper 1 slightly, you will see that the ripped edges match up perfectly within the "frame."

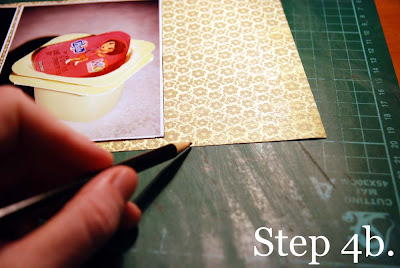
Step 4. Decide how long you want the papers to be and measure paper 1 to your preferred length. I have added the two photos to the paper to assess how long I need paper 1. Make a small pencil mark where you want the paper to be ripped (allowing about an inch from the photos.)

Step 5. Using your paper trimmer, remove the excess paper.

Step 6. Place paper 1 on paper 2 with the torn edges about 1cm apart then measure paper 1 and add 4.5 to 2cm on the straight edges (length.)


Step 7. Line up the straight edges of papers 1 and 2 (remember to leave 1 to 2cm on the top and bottom) and repeat step 3, slowly ripping towards yourself. You will now have a perfect torn edge that frames paper 1. Ink the edges or distress them for added dimension then use these elements to assemble your page.


I have used this technique on my recent Messy, Messy, Messy page to create dimension and add layers.

If you have any questions about this technique, please don't hesitate to ask. Thank you and Happy Scrapbooking.
6 comments:
That is such a cute layout! Love it!
Thanks Nati, I loved putting this together.
great tutorial, Melanie! love how you even used the technique on the smaller photo
Thanks for sharing the tutorial it's such a cute LO x
LUV MESSY babies!! ;D {thats prob cause mine are beyond that stage!}
great chllge this mth, and luv that tutorial, great technique!!
just hopping by on the CWC {Chat with Charm} CC blog hop! x
Thanks for the wonderful comments ladies, im glad you enjoyed the tutorial.
Post a Comment