Click to check out our current challenge Wacky Words

Be sure to visit our August/Sept sponsor Tres Chic Unique
Showing posts with label techniques. Show all posts

Tuesday, March 29, 2011

3/23 A Sketch from Brandi

Hey all! Brandi sent me this wonderful sketch and 2 awesome examples to inspire you this week! Enjoy!


Wednesday, November 24, 2010

11/23 Heather's rockin spiral flower technique

I'm obsessed with spiral roses. Seriously. I love how easy they are to make and how you can make them small or big, with glitter or without. The possibilities are endless!
So today, I will show you how to make them!
1. First, you will need to trace and cut a circle from your paper.  I just used a tin to draw my circle. Double sided paper works best for these, but one sided paper (like I used) works okay, too.

2. Now you need to cut a spiral into the circle. It doesn't have to be perfect. Make sure when you get to the center of the circle that you leave a big enough piece left. That piece will be the base that you glue your flower to.

3. Cut off the funky piece to make your spiral look more uniformed.


 4. Starting from the outside, roll the paper as tight as you can.  Continue to roll until you come to the base. Once again, the roll doesn't have to be perfect either.

 5. Before you glue your flower to the base, carefully let go of the spiral so that it kind of fans out. You can adjust your flower to be as tight or as open as you want it to be.

6. Glue the spiral to the base. Make sure you use a heavy duty glue. (I like Beacons.) After you glue it together, hold it together for a few seconds to help it adhere. Set it aside for a couple minutes to dry.


7. Now is the fun part! You can paint, glitter, ink or distress the flower. Or just leave plain!!
On this flower, I used a glue pen to disperse glue on random parts of the flower. Then I poured glitter over it.


I hope you enjoyed learning how to make your own spiral roses! They are very addicting to make!


Happy Scrapping,
Heather Gerrits

Monday, November 8, 2010

11/08 Melanie's dimension trtechnique

Today I will be doing a tutorial on adding dimension to hand-cut paper flowers.
This can also be used for store bought paper flowers and light chipboard flowers.
Step 1.
Firstly hand cut the flower from your patterned paper.
Using a sharp craft knife and sheet of glass for best results.
If you desire, you can ink the flower before curling to achieve the all over inked edges.

Step 2.
You will be using a kebab skewer, awl or other sharp pointed tool to curl the edges.
Place the sharp end of the tool on the tip of the flower petal

Step 3.
With your finger on the flower tip, lightly turn the skewer and push with your finger to assist the paper to roll up. Move on to all petals until they are curled in.

Step 4.
All petals will be curled in now, you can lightly pull out the curls until you are happy with how they look and depending on how tight you want the flower to be.

Step 5.
Your flower will now be raised and have dimension yet not be overly bulky for your albums.

The flower is best stacked using different sized paper flowers. Embellish with brads, pearls or any other embellishment you have on hand.

This is a card I created using this technique. I left the bottom flower flat so the top layer looked more 3-dimensional.

Wednesday, September 8, 2010

9/08 Jenny's "Patterned paper is your friend" techniques

I like patterned paper.  There.  I said it.  Sure cardstock is pretty, but come on, now isn’t this fun?!?…


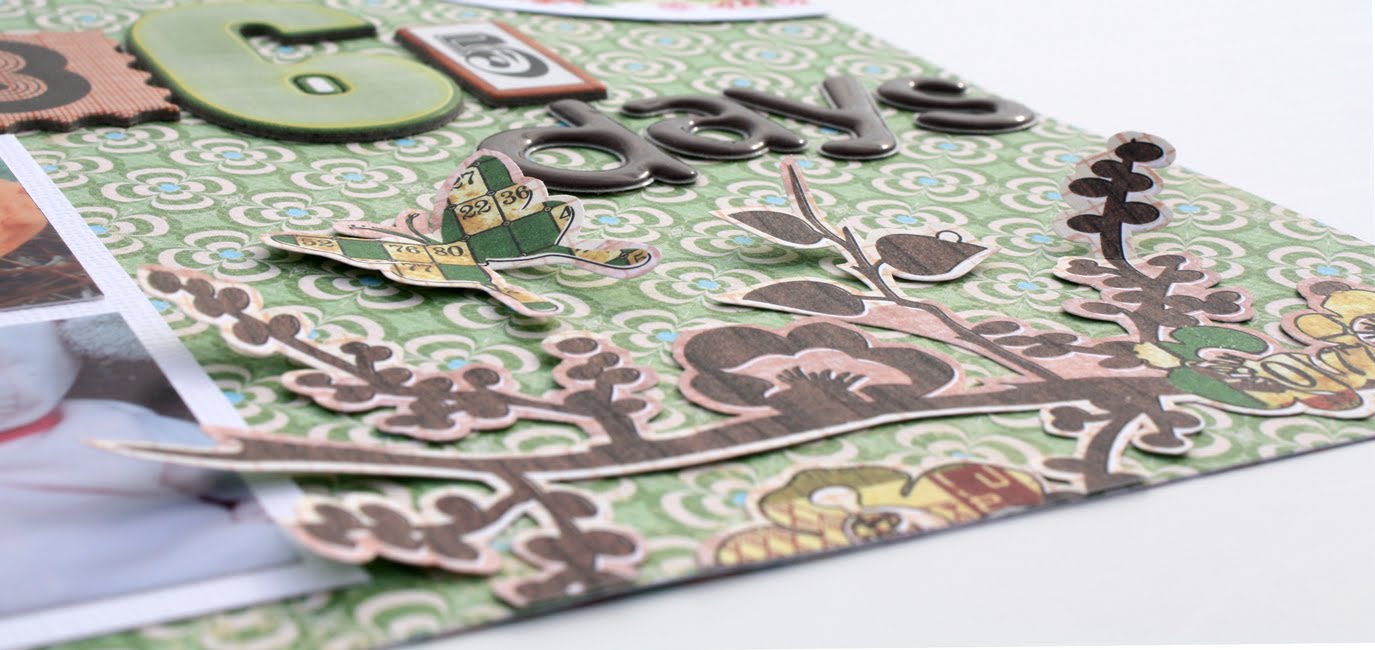
Yikes.  I have a lot of friends who look at my piles of scrappy paper and utter aloud, “ Now what in the world would I do with that?”  I think the problem some people have when looking at busy pp is that they just don’t look close enough.  When I look at a sheet of pp I see what my pink Cutterbee scissors can do with it.  The very first thing I do when I get home from the scrappy store with a bunch of new supplies is to start cutting up my paper.  See that first Sassafras paper above?  I just started cutting into it.  I looked for sections of designs I could cut out while still maintain some orderly shape.  I cut out 2 corners of flowers and mounted them on my base paper.  See here.  Take note of the upper and lower left corners.


 Next I found some more single flowers and cut them out and mounted them on popdots.  Besides my trusty Cutterbees I also NEED a plethora of popdots to add to my patterned paper creations. Like so…


I also cut out one of those cute frames from the second Sass paper.  I cut out the owl that was framed and backed it with a scrap of another Sass paper.  I used that for some of my journaling. To finish it off I used yet another busy Sass scrap and punched the butterflies.


For this next page from my archives,  I used the 3rd Sassafras paper.  Isn’t she lovely?

Insert sass vintage yummy image again

Now, that’s what I call a sheet of paper with endless possibilities.  There are so many cool elements to fussy cut.  The first thing I did was cut out the top set of rainbow rings.  But to clean up the edge I simply took a piece of pp and and pleated it and followed the curve of the  edge of the Sass paper.  Once I had it just the way I wanted it, I stitched it down.  I added a couple more pieces of paper handcut once again and popped up one of them (the frame) with another popdot.  Like so..


For yet a final design element I used another paper and hand cut the branch.  It was facing the wrong direction for my page, so I simply rotated it before I adhered it.  Rather than gluing down each single leaf and branch I only tacked down the main branch leaving the rest to kinda flutter in the breeze.  Like so…


I hope you’ve enjoyed your peek into my mind when I’m playing with my paper and glue.  Now go out and get cutting!

scrappinJen

Tuesday, August 24, 2010

8/23 Ann Katrin's thicker technique

Use your thickers!

I have a lots of thickers and sometimes I need them in different colors and
now I will show you how:

I often use: glimmer mist (spray paint), paint, ink and glitter and thickers in foam:


I love to use paint on thickers, it’s perfect for the dark colored/black thickers:


I often use ink (chalk ink) to get a soft look:


For a dirty/vintage look, I use distress ink:


Glimmer mist gives almost the same results as ink and you can vary the colors:


It’s all about the glitter, I love glitter. You can use it above paint/ink or just like this on the top:

Thanks for reading and I hope you got some tip and maybe you can use some of your leftovers?

Ann-Katrin

Wednesday, June 23, 2010

Brandi's Resist stamping technique

Want to incorporate stamping into your scrapping more? I’ve discovered an awesome technique that will do just that. Resist stamping.

To achieve the look on my layout you will need clear embossing ink, clear embossing powder, ink in your choice of color(s), a heat gun, and of course your choice of stamps. I chose to use a white background because I wanted my “waves” to appear white.

Start by stamping your image with the clear ink and embossing with clear powder. Once you have the design you want completed, with a damp sponge, rub/dab ink over the embossed design. The embossing will “resist” the ink, leaving the white to show through. Blend your ink colors to achieve the look you desire. A similar look can be created with watercolors or walnut ink. This is a great technique to use when needing a certain patterned paper that you can’t locate.

Monday, May 24, 2010

5/23 Dani's rockin paint techniques

Good Morning everyone!  I hope you are all enjoying your weekend!  Today, I’m going to share a few tips for using paint on your mini albums.  Of course, you could use these tips on your everyday scrapbook pages as well, just remember to use thick cardstock.  It seems that a lot of people are a little afraid of using paint, but I’m hoping to get you all out of that!  No matter the outcome, just tell yourself, “It’s just art!”

What you’ll need:
Chipboard mini album
Acrylic paint (3 different colors at least)
Texture Builder for acrylic paints (you can find this in the paint section as well)
Small mist bottles (such as Ranger’s Mini Misters)
Lace paper scrap
Paint brush
Round sponge brush (not pictured)
Paint tray
Optional: Puffy paint (not pictured)

Technique 1: Using lace paper and paint to create interest.
Step 1: Paint the album page a one solid color and let it dry.
Step 2: Put the lace paper over the dried page.  You can secure it with masking tape or some other way, but I’m messy and just held it.
Step 3: Let it dry and then decorate.

Technique 2: Using mini spray bottles with paint.


Step 1: Paint the album page a solid color and let it dry.
Step 2: While it’s drying, take two spray bottles and put one part acrylic paint (one color in each) and one part water in each bottle.  Shake and test spray.
Step 3: Once the page is dry, spray the first color on.
Step 4: Spray the second color over the top and let dry.  Then decorate!

This is one of my favorite techniques!  I love the way the colors bleed into the original brush strokes!  It looks really awesome in person!


Technique 3: Using Texture Builder

Step 1: Mix acrylic paint and texture builder to create desired texture (or as directed on bottle).  I used one part paint and 3 parts texture builder.
Step 2: Using round sponge brush, lightly dab the paint mixture onto your page, and slightly twist it as you pull back up.  Play around with it a find a method that pleases you.
Step 3: THE HARD PART!!  You HAVE to let it completely dry.  I recommend NOT using a heat gun because it may mess up your effect.  Let it dry the old fashioned way.
Step 4: DECORATE!

And now you may ask, “Well what about the optional puffy paint?”  Notice all of the white dots around my finished pages?  That’s the puffy paint!  I love using puffy paint as an extra little added design element.  It’s also great for doodling (butterfly trails anyone??)! 

If you would like to see the rest of the pages in my album, visit my blog alongcamedani.blogspot.com. 
Hope you all have a great Sunday!!
-Dani

Tuesday, March 23, 2010

3/23 Sarah's epoxy embellishments tutorial

I made the coolest embellishments out of things lying around my scrap room. They were so easy to make (not to mention SUPER cheap) and they came out looking so good. I started making the chipboard buttons and they were so addicting I moved on to stamped images.

To make your own epoxy chipboard buttons:

You’ll need:
*Aleene’s paper glaze (or any dimensional glaze)
*Chipboard circles (you can cut yourself or buy premade circles and peel them in half Mine are 1” and 1.5”)
*Leftover paper scraps, stickers, rubons or anything flat.
*a trimmer or scissors
*glue stick

Use a glue stick to cover your circles with patterned paper (I used scraps.) Trim off excess paper. Embellish. Using the pointed tip on the bottle of paper glaze apply a thin layer over the top of your circle making sure you cover the entire surface evenly. At this point you could sprinkle glitter or add small beads.

You need to allow the glaze to dry overnight. Do not worry if it appears cloudy. It will dry to a clear glass like shine. The thicker the coating you apply the longer they will take to dry. Try not to touch until dry or you will leave fingerprints.


Easy peasy lemon squeezy, right?

Now check this out…,,,

You know that piece of thin chipboard that you get in kits or in the back of paper packs? Never throw this away. Its time to recycle it and get out your stamps….

 Use your stamps on white cardstock and color them. (I used sharpie markers) Use your glue stick to adhere image to chipboard sheet. Use scissors or your craft knife to cut out image. Apply dimensional glaze and allow to dry just like you did with the buttons.

Now you have your very own custom epoxy embellishments for pennies!! I cant wait to see what you CREATE with this simple technique.